It’s been a week since I’ve returned from Mt. Bromo with a group of friends. And I’m already missing that place..
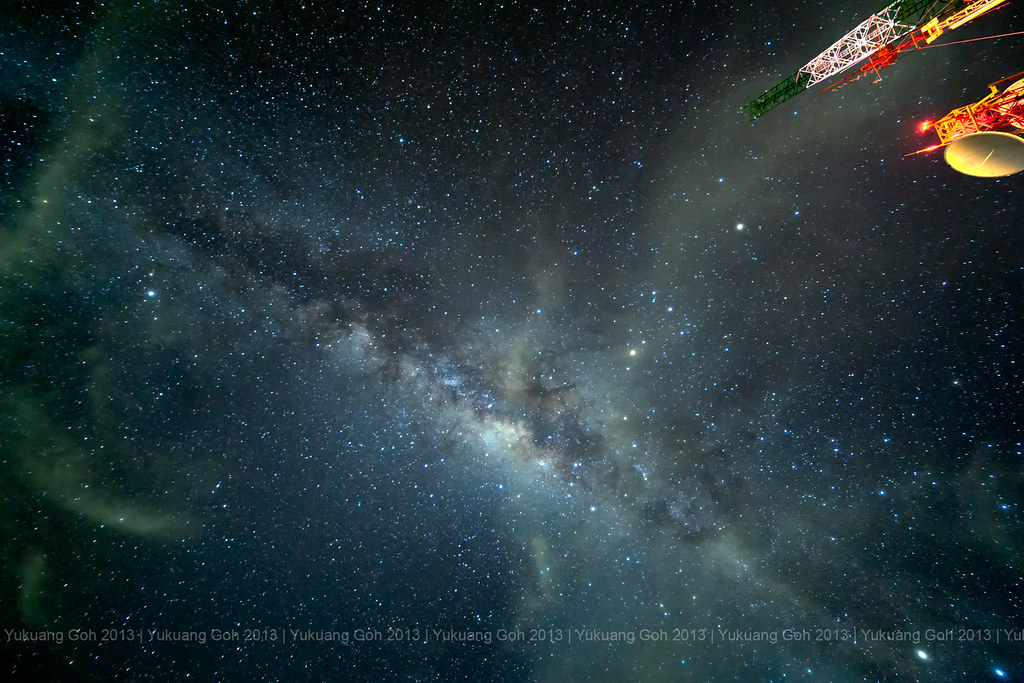
My first time seeing the Milky Way with my own eyes
It’s really a memorable trip for me, for the first time I’m really able to see the Milky Way with my own eyes and not using digital ‘trickery’ (processing) to get the stars to appear (I’ve tried that many months ago in the light polluted heartland in Singapore).
It’s really an amazing sight for me… We were up in the mountains since a few hours before sunrise (~2.30am) till past sunrise (sunrise at around 6am). The wind is quite chilling when earlier (~5 deg cel). So appropriate dressing and footwear is required.
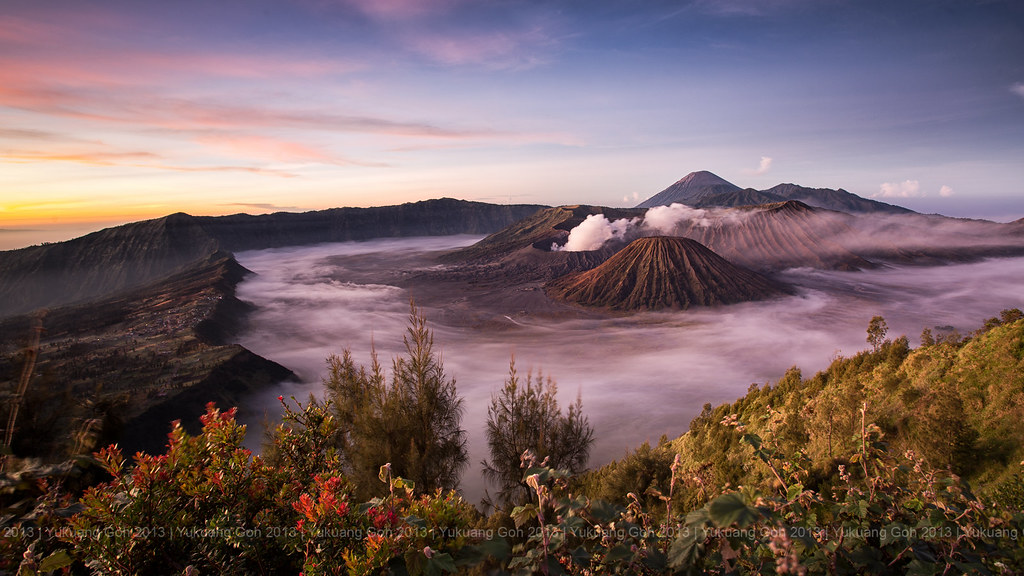
Sunrise – Mt. Bromo
Shortly after sunrise, we hurried down the mountains to the place they call it the “Sea of Sand” or the Sand Sea. Before the sun hits high, the mist gives the place a mysterious feel.
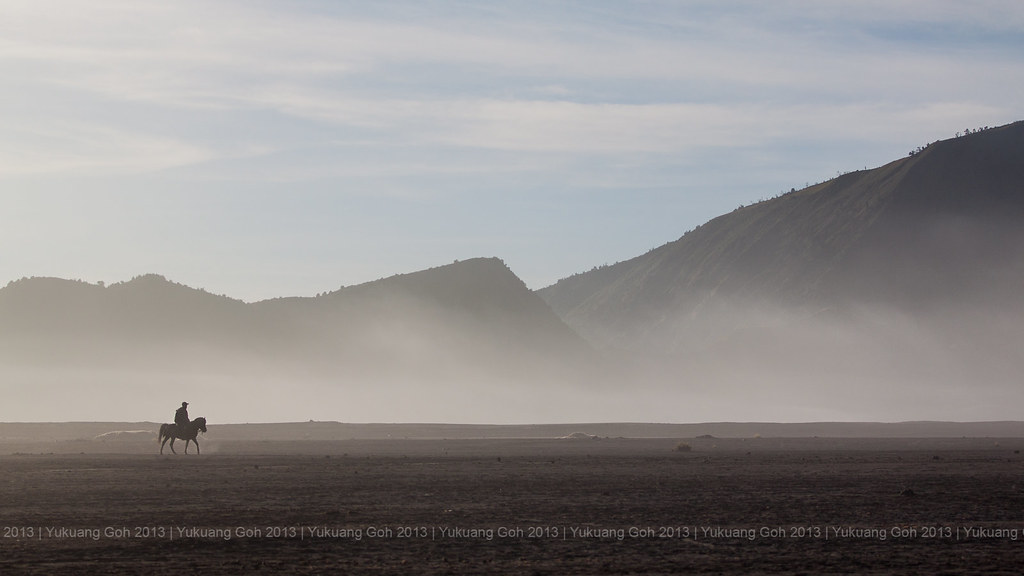
Sea of Sand
Looking back, I think I like the Sand Sea the most. If compared to the other places we have visited in the few days we spent there.
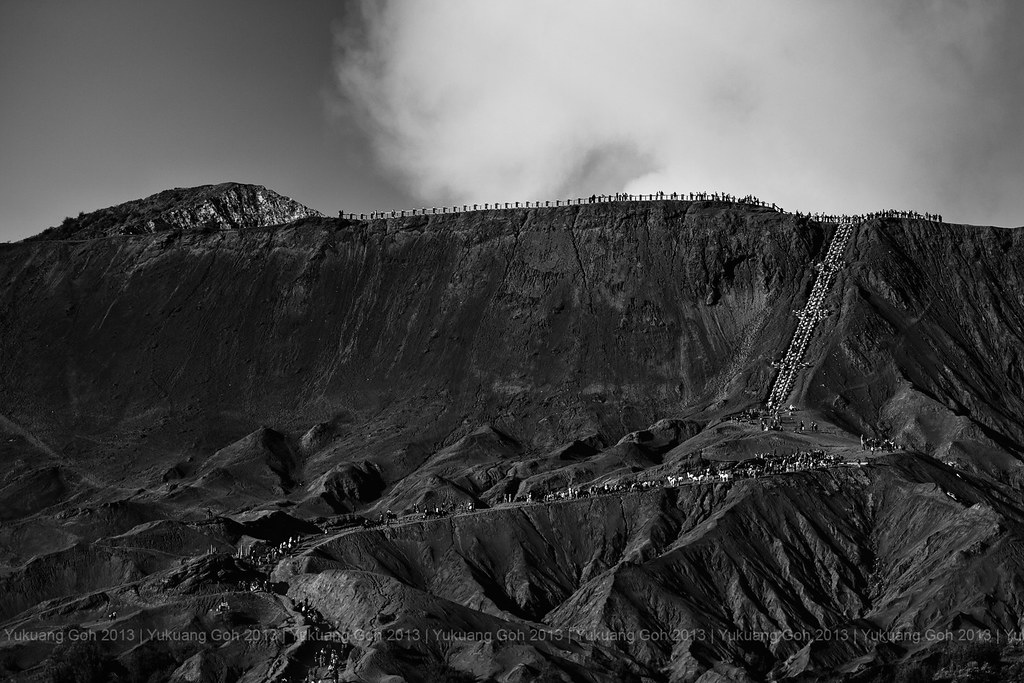
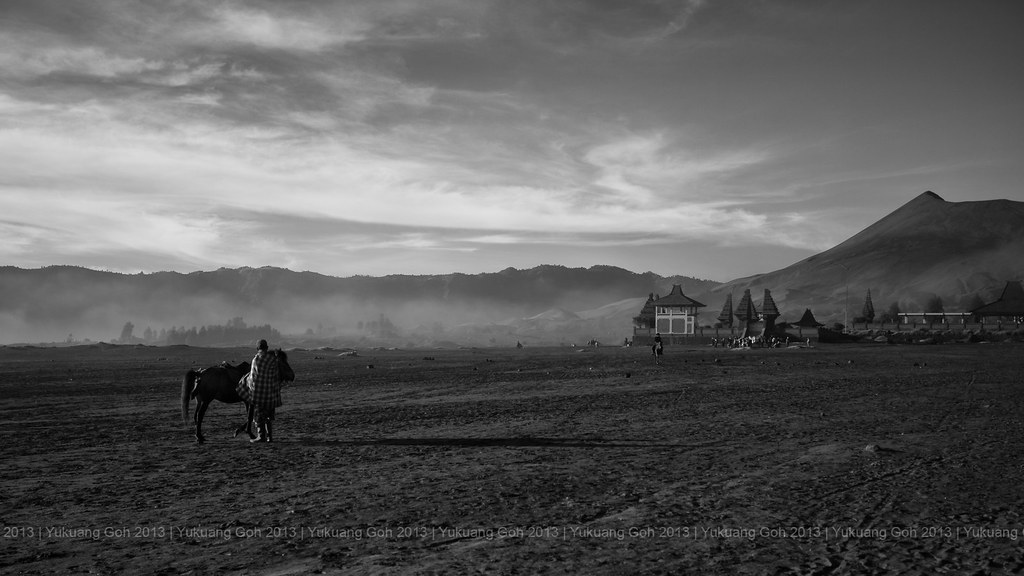
Journey to the Volcanic Crater
You can walk up the volcanic crater and see the steam coming out of the “hole”. But, looking at the crowd, I chose to stay down at the plains and breakfast looks more tempting than anything during then (4 hours in the cold mountain top really took quite some energy out of us).
Apart from shooting the Mt. Bromo’s view, we also went to the Papuma Beach which is ~5 hours drive away from Mt. Bromo. We set off shortly after breakfast and to be able to catch the Sunset at Papuma Beach.
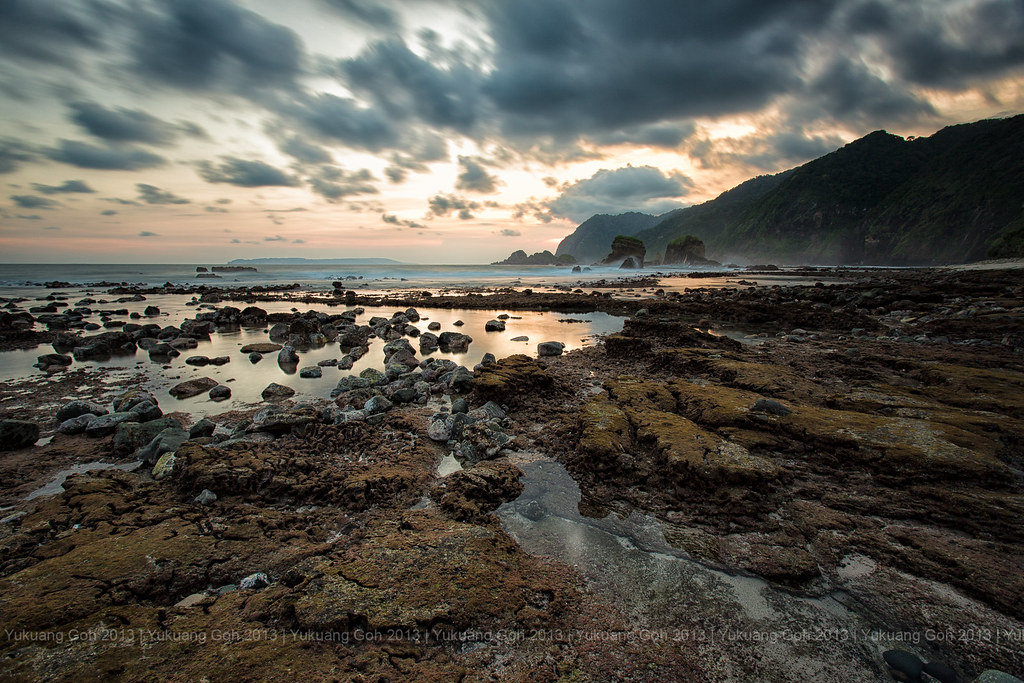
Sunset @ Papuma Beach
This place isn’t the best place for tourist who have mid-high expectations of a hotel stay. So travelers staying there for the night, best manage their expectations… On the other hand, for photographers, it may be a nice place to shoot some seascapes. The waves behind me are at least 1m high, I’ll recommend practicing caution when getting near those waves. The other aspect to take care of is the sea life hiding in between the rocks/stones…There are TONS of sea urchins (both dead and live ones). So do tread carefully.
I didn’t manage to get my ideal sunset due to poor calculation of long exposure and it became too overexposed to recover the highlights. So this became my only Sunset shot for this place.
After having some food for dinner, we headed back for some Milky Way shoot… But the results is relatively disappointing (as compared to the one seen at Mt. Bromo). And before we can get some decent shots, large pieces of clouds covered the sky and we called it a day and prep ourselves for sunrise shoot instead.
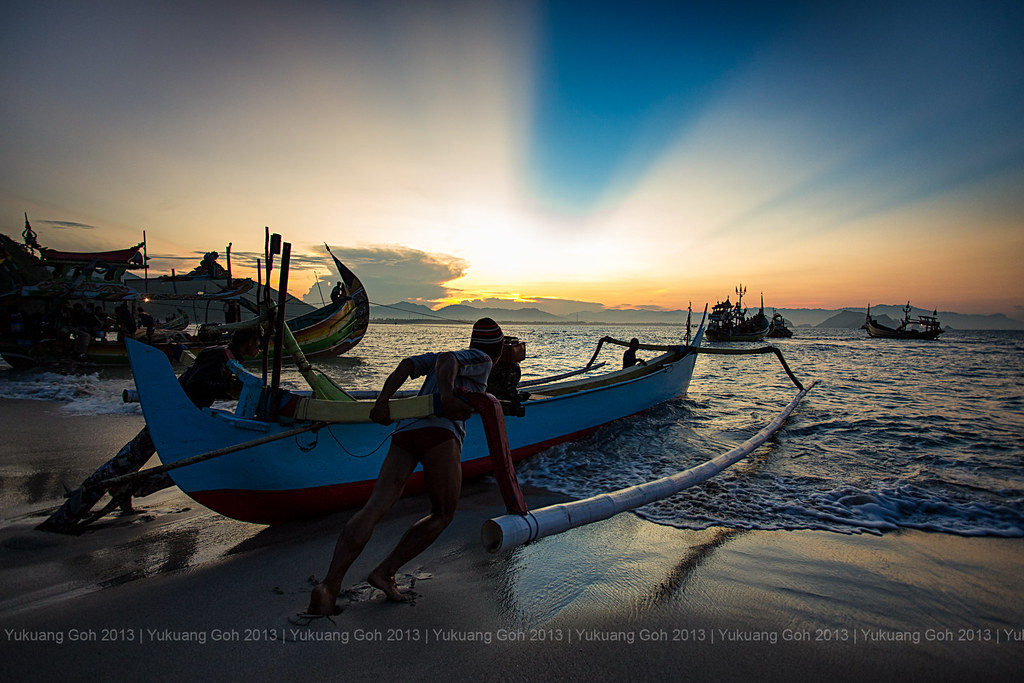
Come sunrise, there were already much activities by that time. Fishing boats returning to shores and smaller boats going out to fish. It’s also one of the few times I’ve ever shot action stuffs before Sunrise. So I was bumping ISO to at least 1600 just to capture sharp actions. And by the time the sun have risen, the boat activities have died down. So one can walk along the long beach and grab some nice seascapes. For the lazy me, I choose to just walk along slowly and enjoy the moment more than shooting.
There are still some photos left to process for the last day when we return to Mt. Bromo from Papuma Beach. But I’ll just upload these for now and update the rest during the week.
For the last photo I’ll share in the post.. My first attempt in shooting Star Trails. Personally, I’m relatively pleased with what I got considering it the first attempt.

Star Trail @ Mt. Bromo
A stack of 30 shots of 2min exposure shots digitally processed. I have loads of fun playing around with this shot…
Overall, this trip have been a fun and enriching trip for me regarding shooting in the dark and processing milky way/star shots. To be honest, I didn’t have very high expectations of the trip as I’m expecting tons of photography screw-ups due to my lack of experience in shooting ‘stary’ scenes. And on the first night, I’ve already considered the trip a “huge success” for me already as I’ve got my Milky Way shot and the SOP shot of Mt. Bromo.
The last shot, the star trail is a BIG bonus to me. When I was exposing many 2 mins shots, I didn’t really see much things on the LCD of my camera. and to top it off, nearing sunrise, many tourist came with bright LED torchlights shining at the foreground and stuffs. So I thought that it’s a failure, but I still continued to expose till the the 1 hour mark. Even till the last day of the trip that I still though that it was a failure star trails shoot. But upon reaching home and loading the images into my computer and I decided to see how it’s like… And I realized.. Whoa…after a bit of cleaning up caused by the tourist with LED lights, I recovered my foreground and cleaned up the flare. I know it’s not an award winning kind of shot, but to me, it’s priceless…
Technical Stuffs
I’ll just go into the shooting the star scenes…
Gears intro…
- EOS 5D3
- Samyang 14mm f2.8 (for star scenes)
- 17-40L (scenes that requires wide angle and filters)
- Tamron 24-70 (other general scenes)
- EOS 500D + 70-200 f2.8L
- Sirui R1204 Tripod
- Timer Shutter Release Remote
Getting the gears is the ‘easy’ part….
1) Before the actual shooting, make sure that the remote is attached to the camera. You will not want to touch the camera if you are going to do star trails.
2) Focusing at the stars in the dark is a pain in the past. But after the trip, I realized the easy way to focus with my Samyang 14mm… The infinity focus that doesn’t work for my usual landscape shoots works marvelously for stars! Turn it to the line of infinity focus mark and you are set for shooting the stars. But for those without the infinity focus mark, will have to do multiple guess work and exposing and testing over and over again at every scene.
3) Calculating Exposure using the 500 rule (If you are using a crop body, use 800 instead. 1.6 x 500). 500 / focal length used. I’m using a 14mm, so it’s aprox 35sec. But I used 30s instead. So once you have the max exposure time, work backwards to get the ISO required. I usually end up around ISO3200 at f2.8. So, my “default” settings for a star scene is 14mm, f2.8, 30s, ISO3200
4) Because it’s so dark, it might be easier to get a few test shots to get the framing right. After that is just shoot.
The rest is just practicing..
I’ll try to find time to finish processing and upload the couple of the unprocessed photos during the week.
Regards,
YK
